cake frosting robot
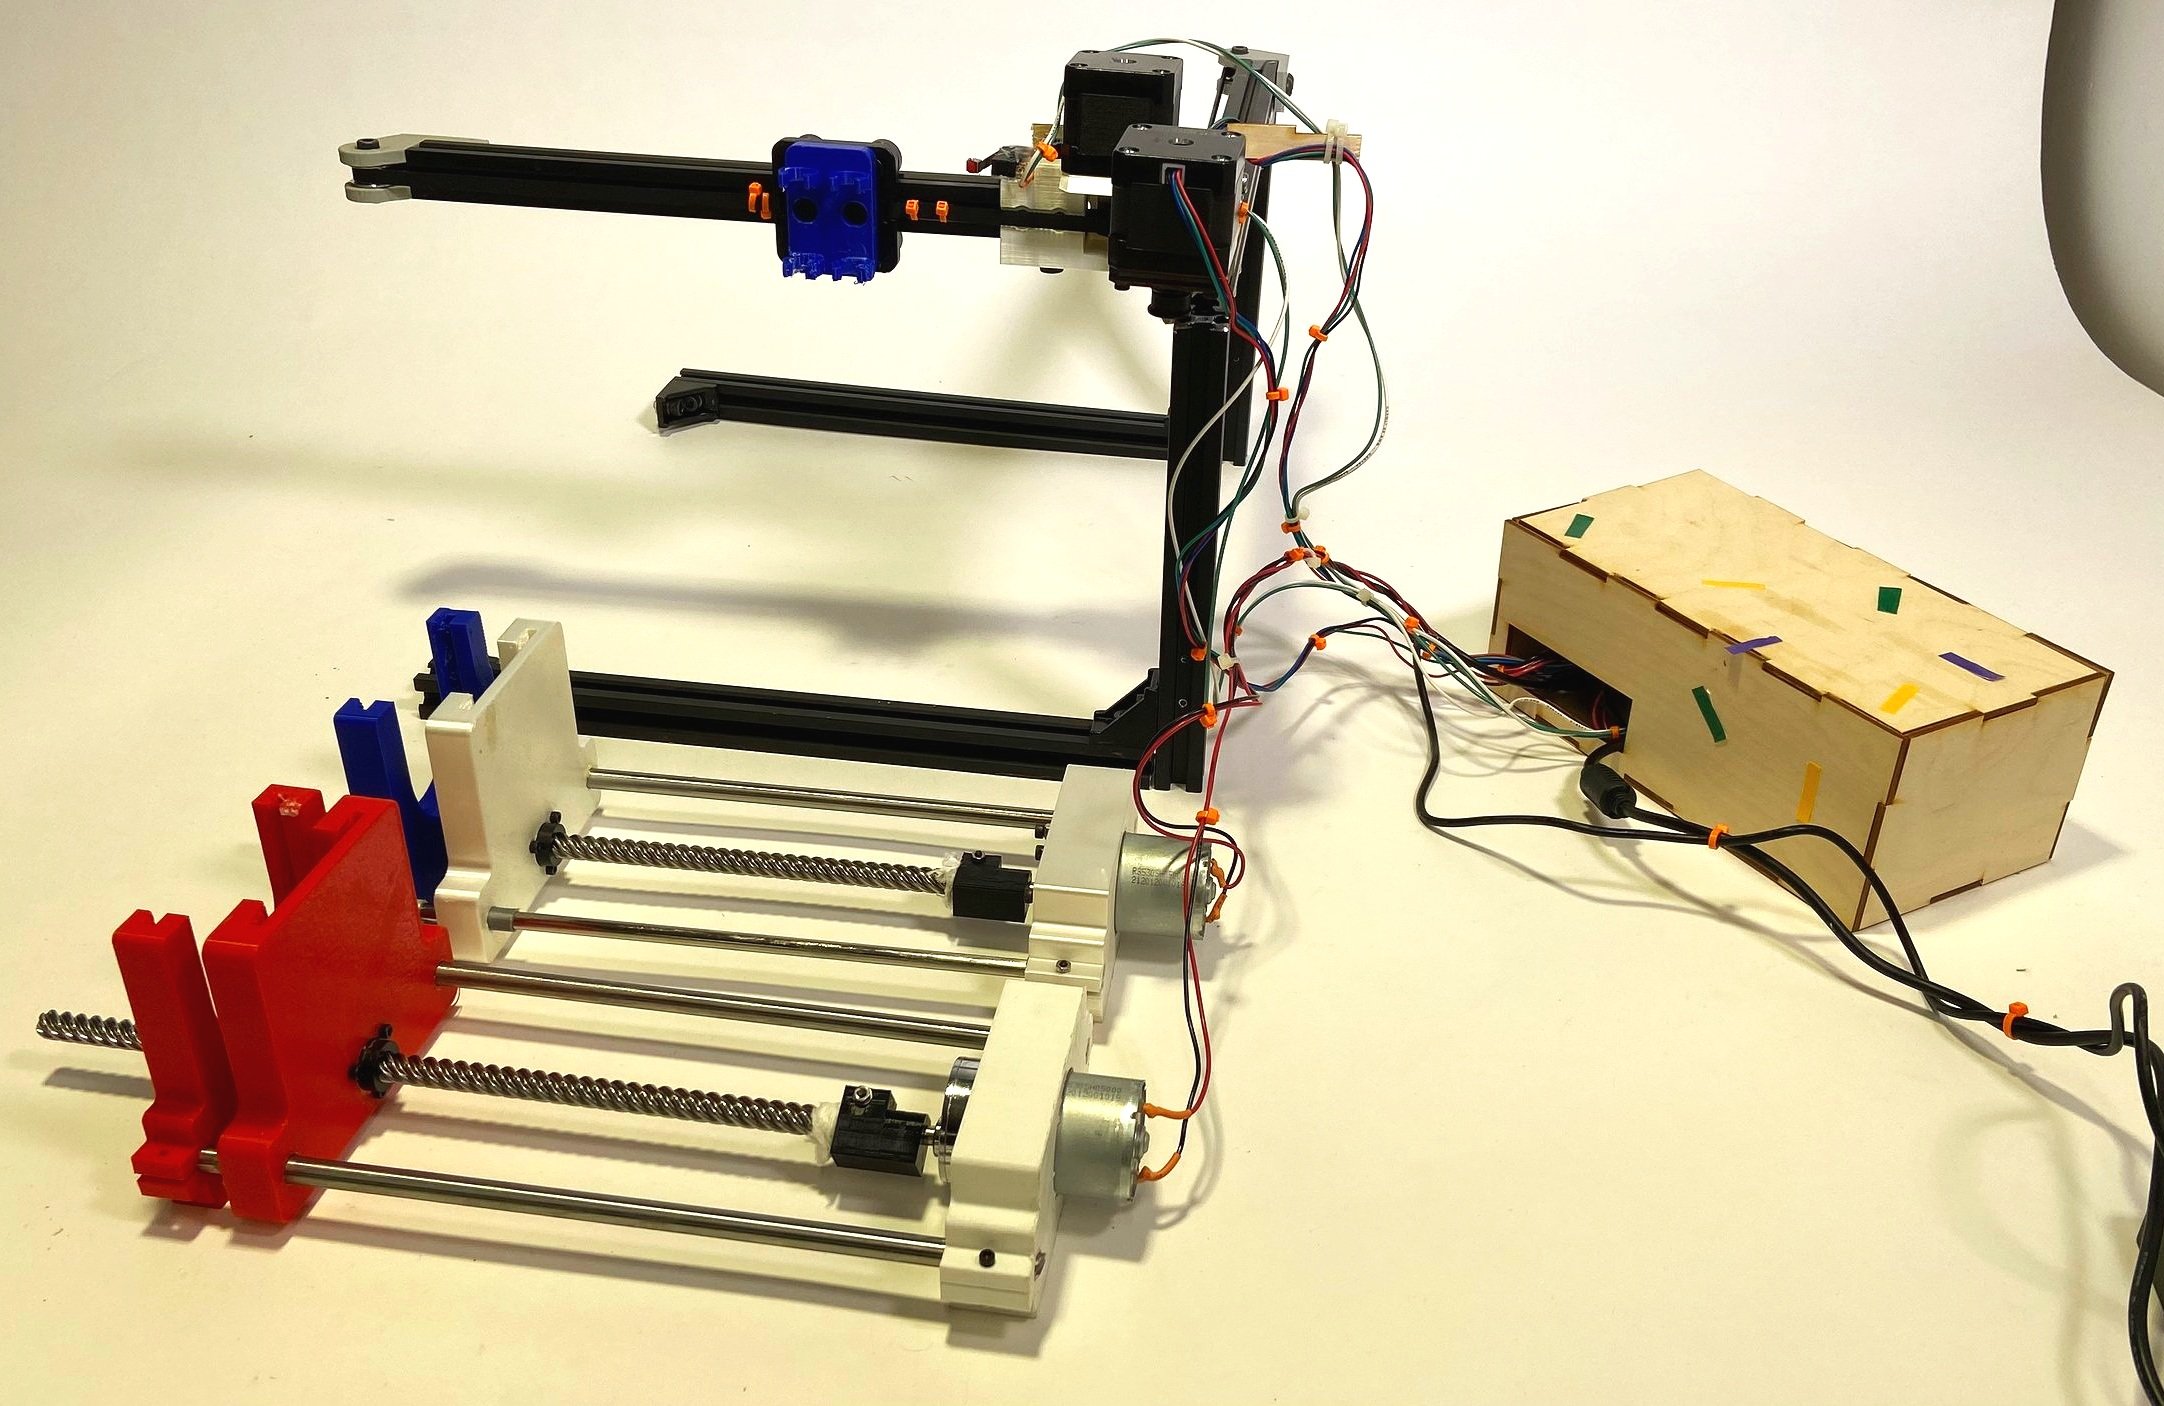
The robot consisted of an x-y plotter, two frosting extruders, and an electronics unit
Project Description
Background
For our final project in ME35: Robotics, our whole class embarked on a team challenge: to build a robot that could bake a cake and frost an image onto it. Our goals were to

The simulator script would simulate the step-by-step movement of the motors given an image input.
Mix the batter
Load the cake into an oven
Load the cake into a machine that could frost it
Frost an image onto the cake, without knowing what the image was beforehand

A CAD model of the hardware created by one of our Mechanical Designers
We all split into teams with different roles, after doing extensive planning to develop a system diagram. You can see the diagram at the bottom of this page.
I joined the Frosting Mechanism team as the project manager. This meant that I was in charge of organizing the design and building of the hardware that would frost the cake. I leveraged my background in additive manufacturing to help the team design a machine that could go around and “extrude” a vector image onto the cake.
Design
We had two design teams running in parallel: mechanical and software. The mechanical design team came up with a 2D cartesian plotting machine driven by two stepper motors and a design for an extruder that would push frosting out of a syringe with a DC motor.
I was on the software design team, which was in charge of writing the motor controllers and route-planning algorithms. I wrote objects to leverage the Adafruit Raspberry Pi motor hat to control stepper motors at the step-level and do route planning between coordinates. I also wrote a simulator script that would simulate the steppers movements and plot them so the user could debug the motor controller. Our programmer wrote code to interpret the coordinates from the image processing team and help plan routes between vectors. The full codebase is linked here.

A system diagram of our frosting robot, comprising the two teams that worked on the machine (frosting image processing, and my team, frosting mechanism).

The frosting robot doing a dry run to test the electronics.

A test of the frosting robot produced this tree. As you can see, the white background still needed some tweaking.
Testing
We began to assemble and test our robot, two weeks before the final project showcase. We quickly realized that while the plotting worked, we needed to improve the frosting extruders. Pushing even the lightest frosting through the syringes required a huge effort, which meant we had to increase our power supply to 5A, strengthen the extruders, and most importantly, liquify the frosting.
We tested many different frosting consistencies and motor parameters and were finally able to settle on a configuration that worked reasonably well. Our robot successfully drew a tree on a cake at our full robot test the night before the demo.
Final Demo
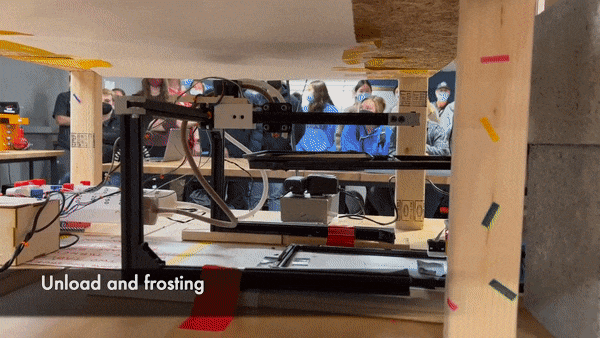
During the demo, our robot frosted an image of an elephant onto the cake successfully. Our whole classes’ system worked together to mix the batter, bake the cake, and frost it. This required cooperation with other teams to ensure that our systems integrated into theirs without issue. The result was a resounding success that we are all proud of, especially for a three week project. A full video of the robot is below, as well as a gif of the frosting section.
Looking back, we would have liked to spend more time tinkering with different methods of frosting in order to perfect a method with a thicker consistency.
During demo-day our robot frosted an elephant onto the cake!